Interacting with a dialog box can sometimes be challenging within Power Automate desktop flows. In this article I am going to demonstrate how you can create a flow which interacts with a file upload dialog box in a Power Automate Desktop.
SharePoint File Upload
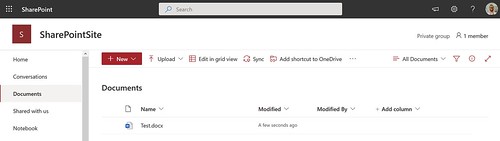
In this scenario I am using a FireFox browser to navigate to a random SharePoint document library. When you click on the upload button a Windows dialog box appears. In this article I am automation the interaction with that box.

You can also automate the interaction with the SharePoint site and pressing the upload button but for this article that is out of scope.
#32770
In this example we are interacting with a Windows dialog box. Windows has different classes to identify this kind of elements.
Microsoft has published an article which describes the Types of Window Classes. In this article we can see the dialog box is associated with the Class #32770. This is a good way of identifying the dialog box UI element.
Input variables
Another part of identifying the correct UI element is the name of the Window. Part of that will be determined by where the dialog box was triggered.
In this instance the dialog box is triggered by FireFox where it will use the title of the page for the window name. The name will be something like SharePointSite – Documents – All Documents — Mozilla Firefox.
You can create input variables which can be used to dynamically generate the name of the window:
– DocumentLibraryName
– DocumentLibraryViewName
– InvoiceFileName
– SharePointSiteName
UI Elements
In this flow we also need three UI elements. You can record them, but I have created them via the Selector Builder. This way it was also possible to add the input variables to them.

Desktop Flow Setup
1. Add a UI Automation > Click UI Element in window action. Make sure you select the Edit ‘File Name’ UI element. Also select Left click as Click Type. In the Advanced settings select Middle Left and Offset X of 90.
This will make the flow click in the input control next to the File Name: label.
2. Add a UI Automation > Populate text field in window action. For the Text Box select the Edit ‘File Name’ UI element. For the Text to fill-in select the InvoiceFileName input variable
This will make the flow type text in the input control next to the File Name: label.
3. Add a UI Automation > Press button in window action. Make sure you select the Button ‘Open’ UI element.
This will make the flow click the open button.
You can also copy paste the Robin code below onto your Power Automate Desktop designer flow canvas.
Testing
1. Make sure you populate your input variables with some test values

2. Navigate to the document library view of the document library in the SharePoint site you used in your variables
3. Click the Upload button
4. Run the desktop flow, it now should be able to interact with the file upload window and be able to upload your test file from the InvoiceFileName variable.
Happy testing!